ChatGPT Integration with SAP S/4HANA
In my previous blog, I discussed the OpenAI tool, ChatGPT, its scope, and its power. We also went through a demonstration of how to use the ChatGPT API endpoint.
We will now take it further and integrate our ChatGPT service with SAP. In this blog, we will explore the capabilities of ChatGPT within the SAP ecosystem. Let’s get started quickly.
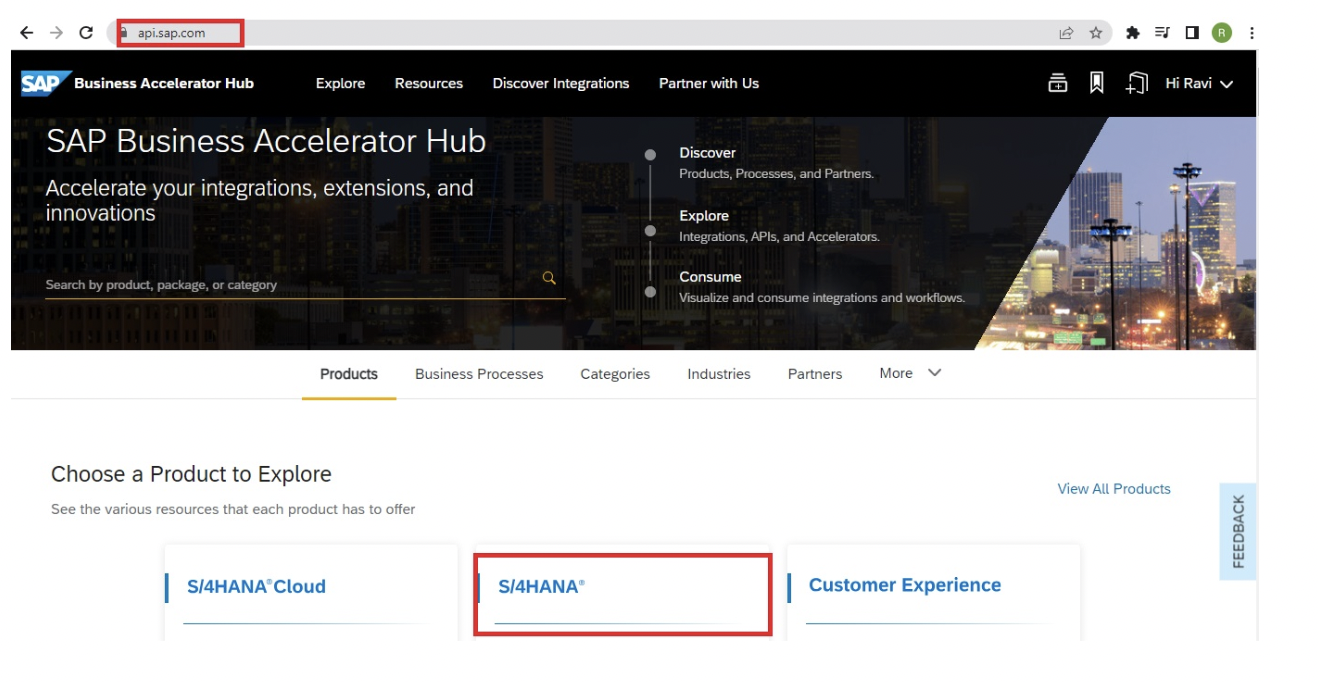
- Log on https://api.sap.com and select S/4HANA.
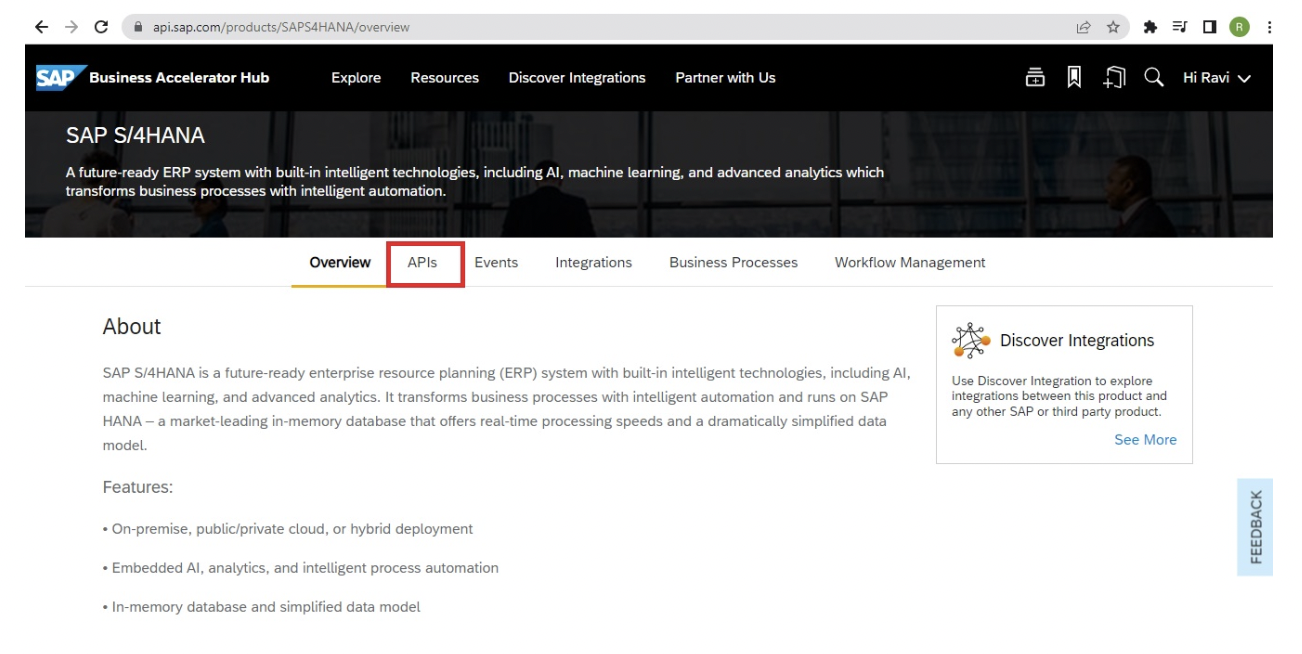
- Select APIs
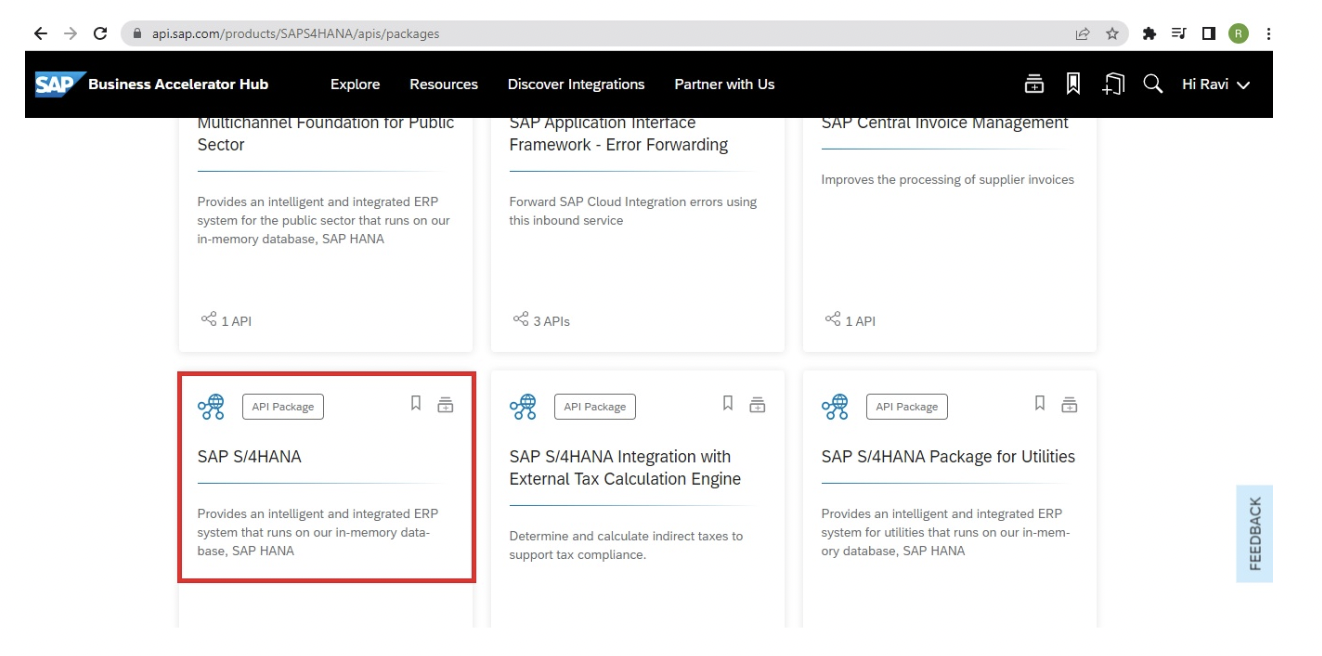
- Select S/4HANA
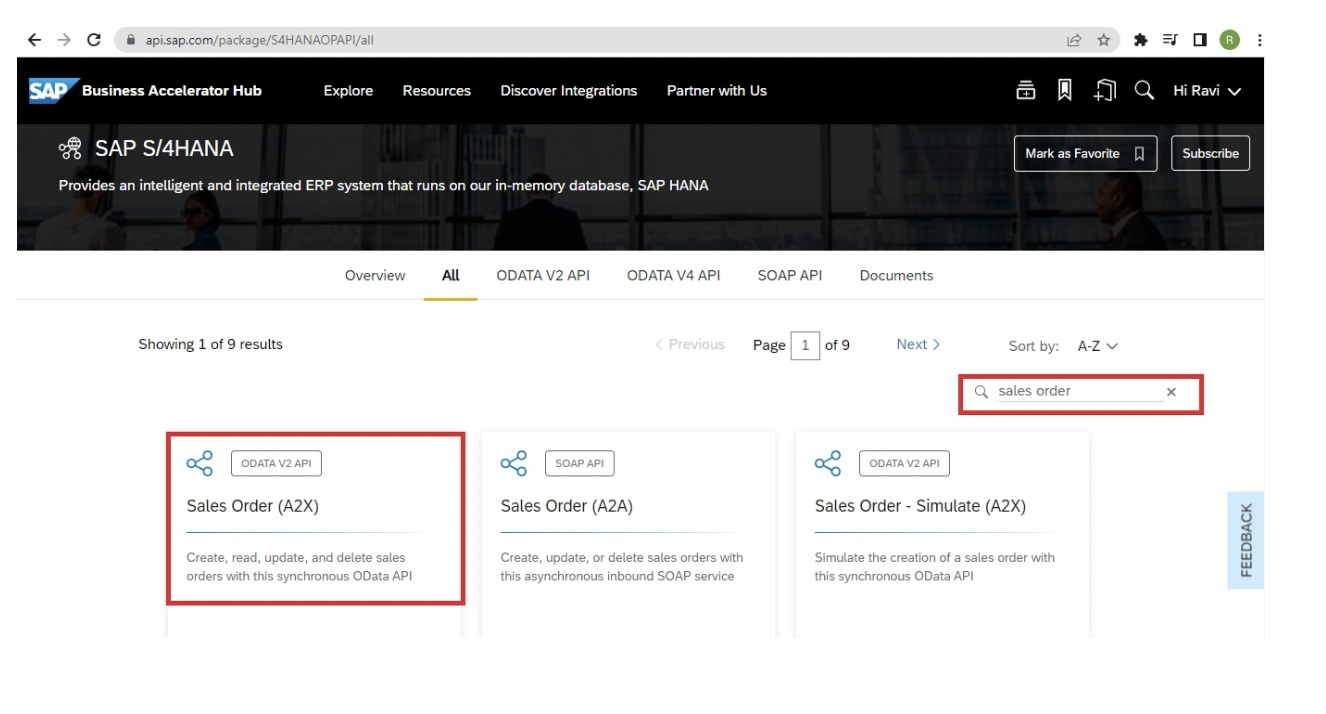
- Search for Sales Order and then Select Sales Order (A2X)
- Select Business Documentation. It will open in a separate tab.
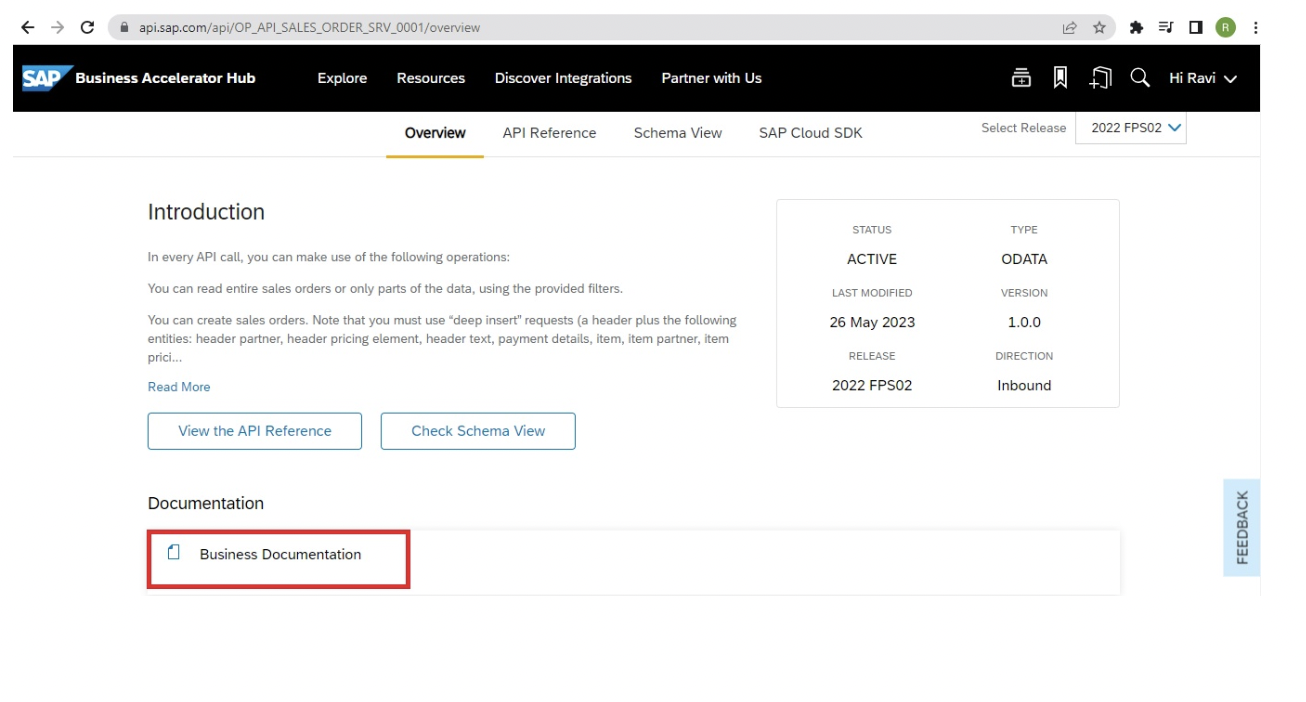
- From the newly opened tab copy the Technical Name
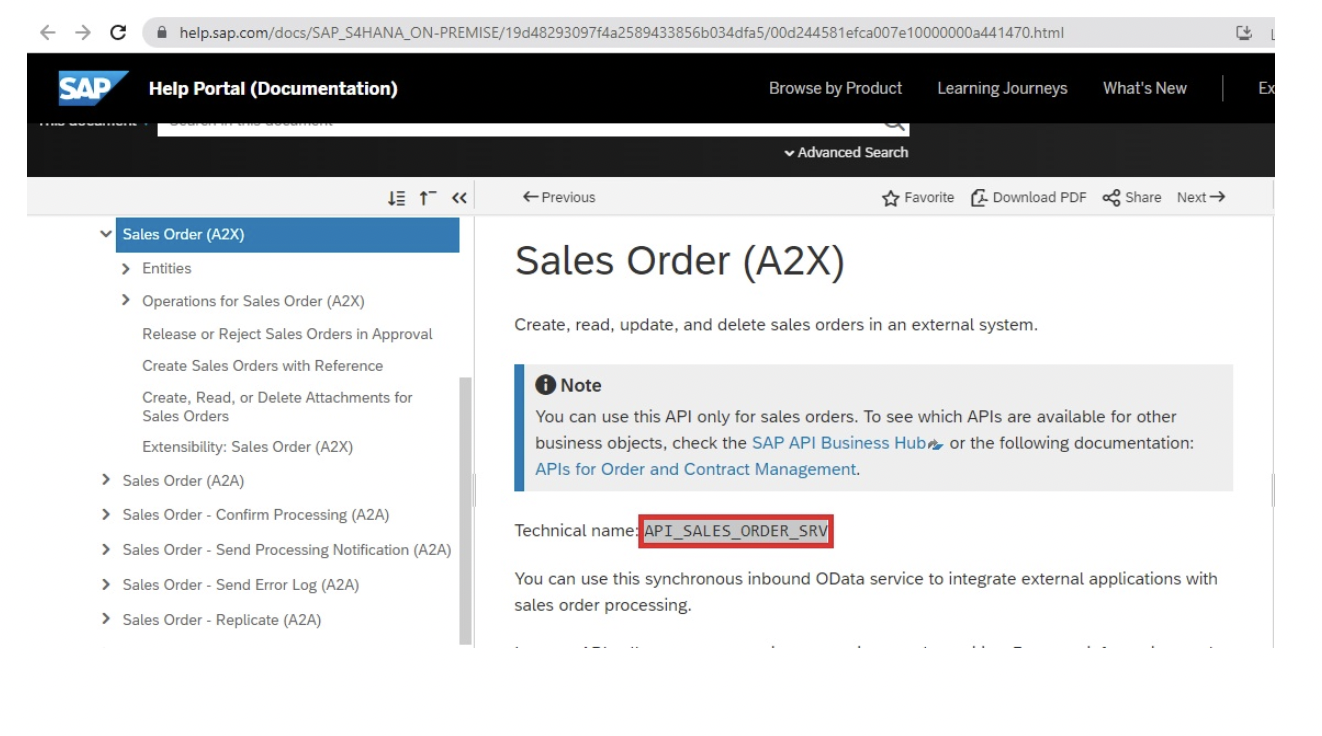
- Cross check whether this service is activated in your HANA System.
- Goto /n/maint_service and search for this service. Check whether it has been activated and registered.
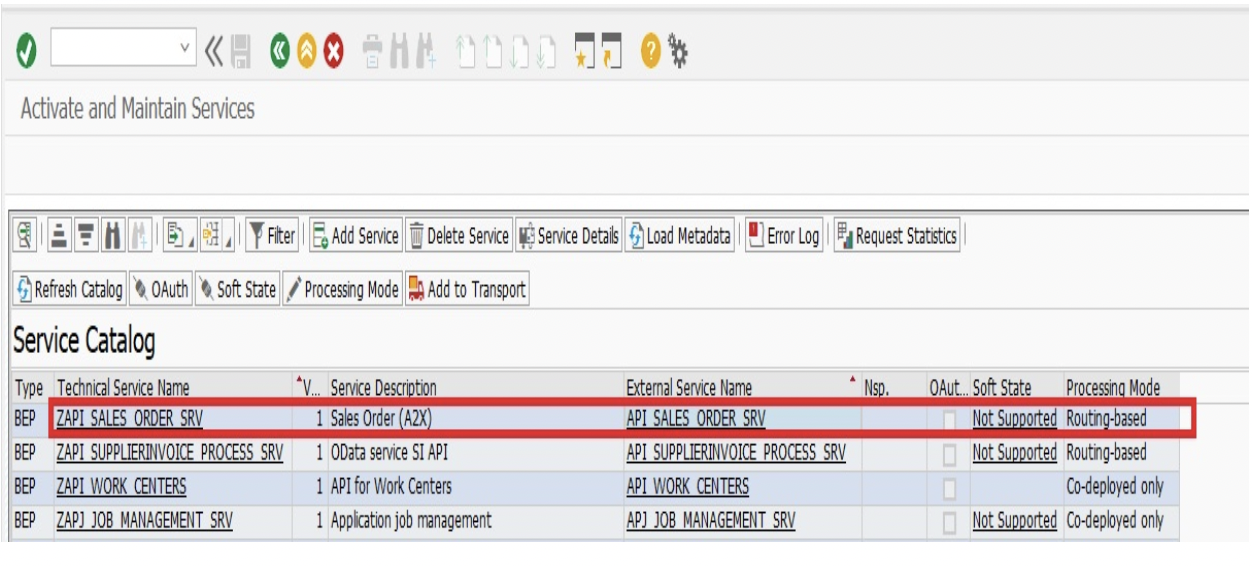
- In this case the API is already activated and registered.
- Now we will call this API from the postman tool.
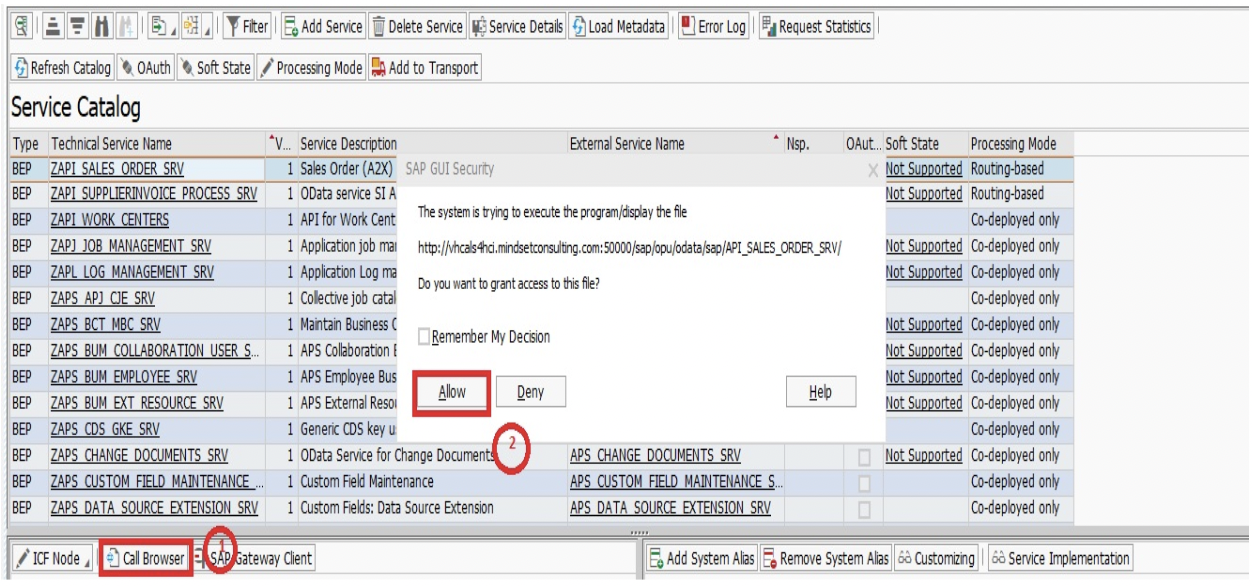
- Click on the ‘Call Browser’ button. A popup will appear. Click on the ‘Allow’ button.
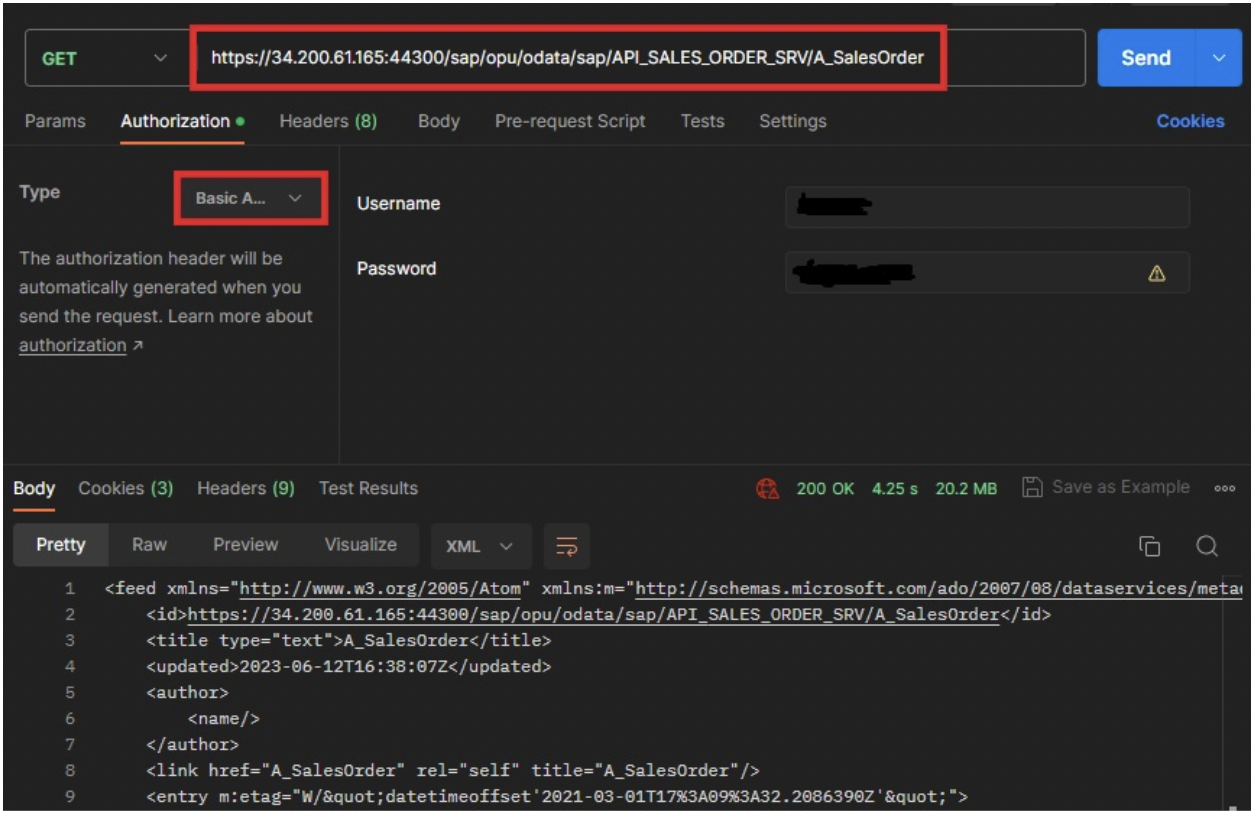
- It will open up the API url in the browser. Copy that url and paste it in the Postman tool.
- Once you enter the URL in the Postman tool, add the Authorization as Basic Authentication and enter your SAP Gateway username and password. Now hit the send button.
- Activate the SAP Workflow Management service on BTP
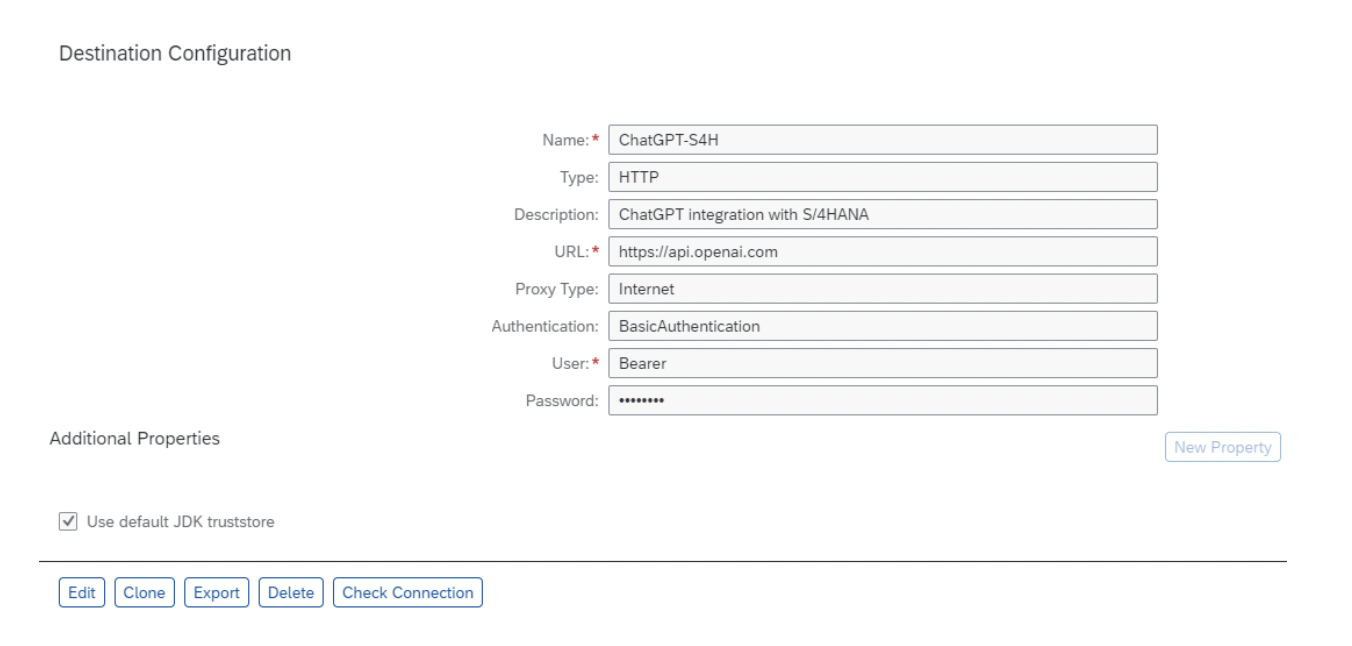
- Create 3 destinations:
- Destination for S/4HANA system
- Destination for mail system
- Destination for ChatGPT
- In the ChatGPT Destination, paste the URL https://api.openai.com and select the authentication as ‘Basic Authentication’. Enter ‘Bearer’ as the user and enter your token key as the password.
- Go to SAP Business Application Studio. Choose Full stack Cloud Application and under the extensions choose Workflow Module. Create the Dev Space.

- Go to the project directory.
- Click on Start from Template.
- Choose Basic Multi-Target Application.
- Enter the project details and then click on the Finish button.
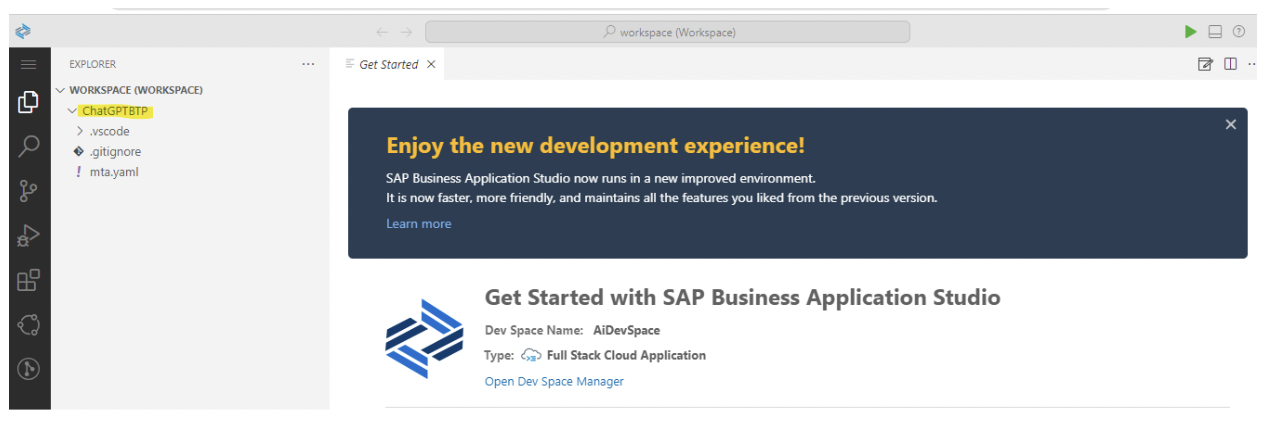
- Right click on the mta.yaml file and select the Create MTA Module from Template.
- From the new MTA Modules Template choose ‘Workflow Module’ and hit the Start button.
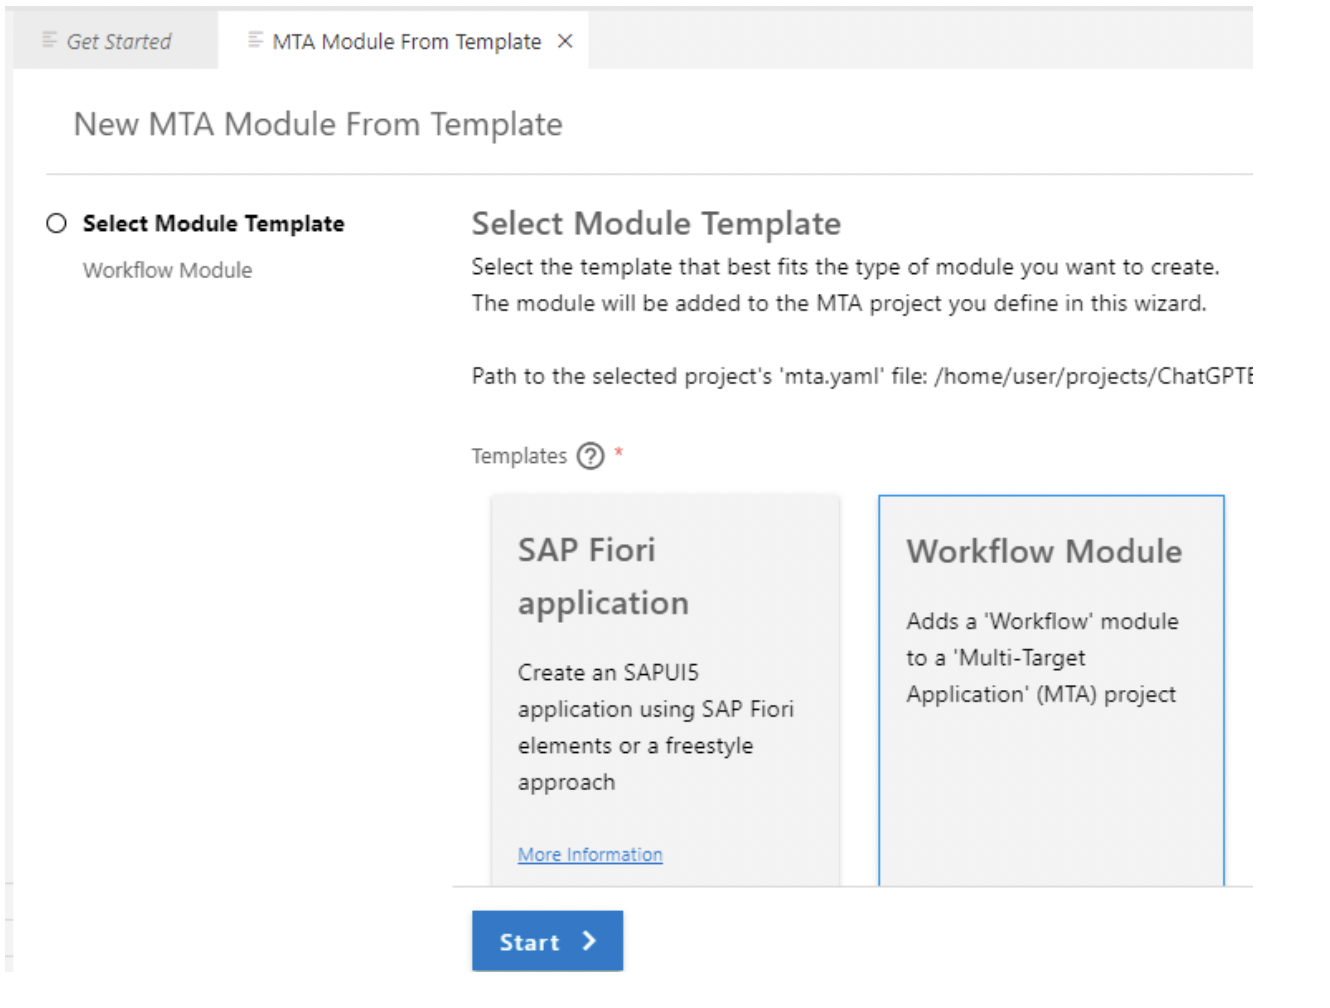
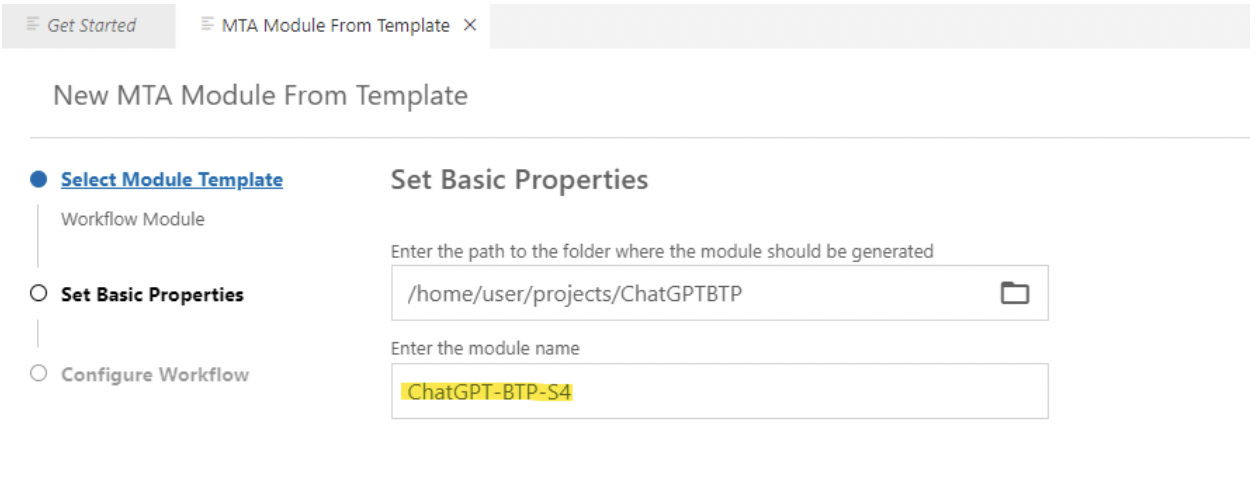
- Enter the module name.
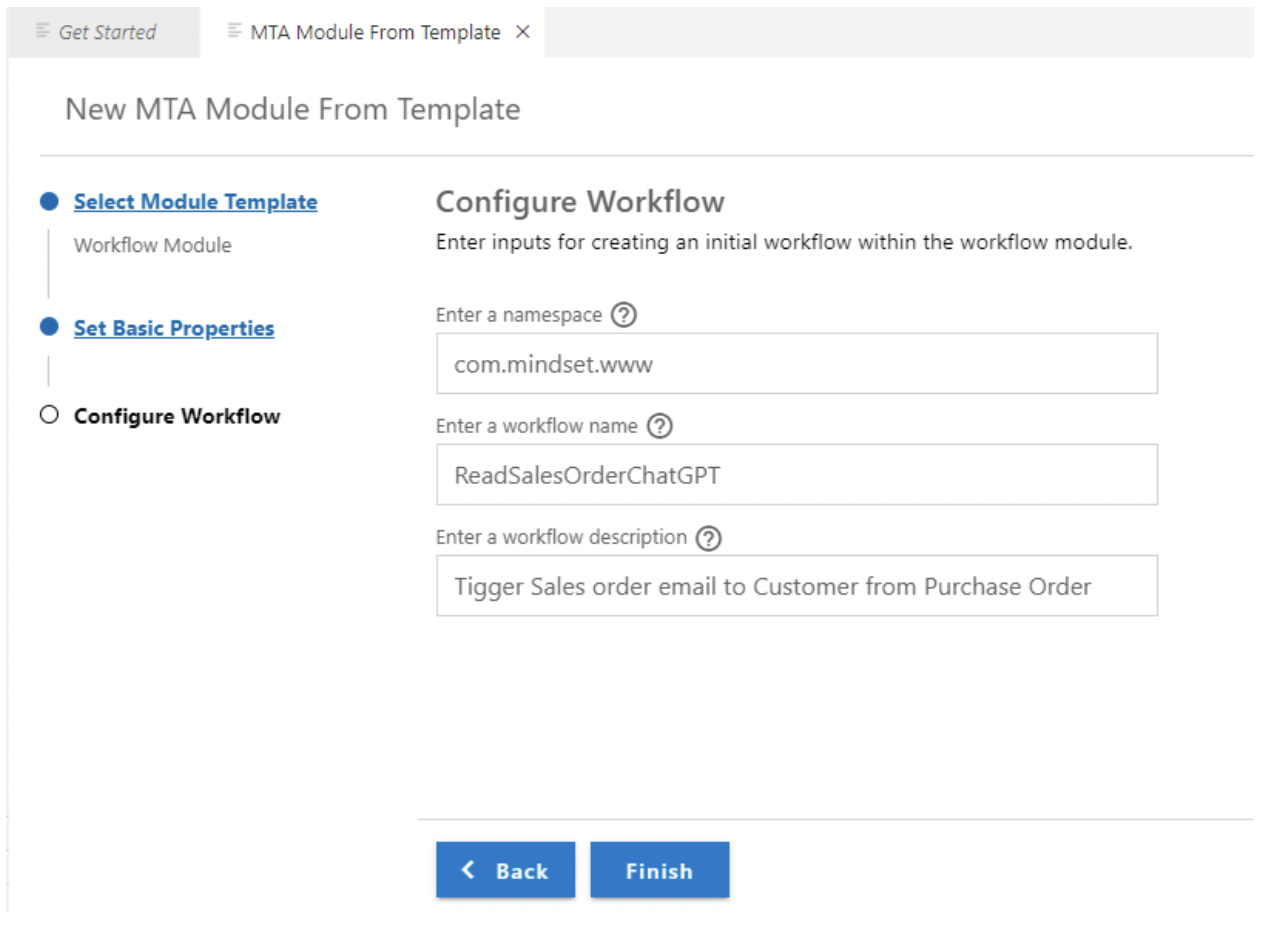
- Enter the namespace, Workflow Name, and Workflow description, and click the Finish button.
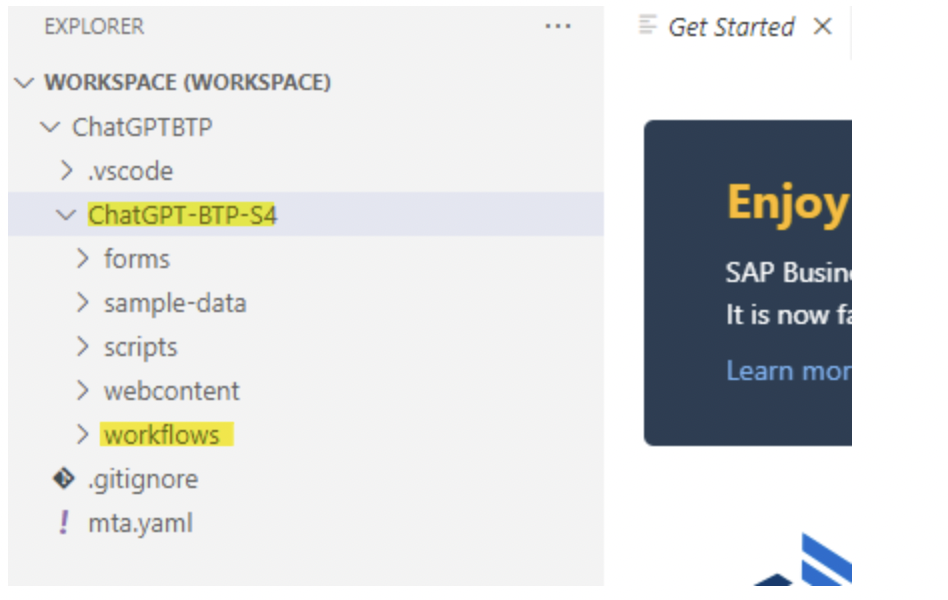
- A new module has now been created in our project.
- Double click on the .workflow file inside the workflows folder it will open up a BTP workflow designer tool.
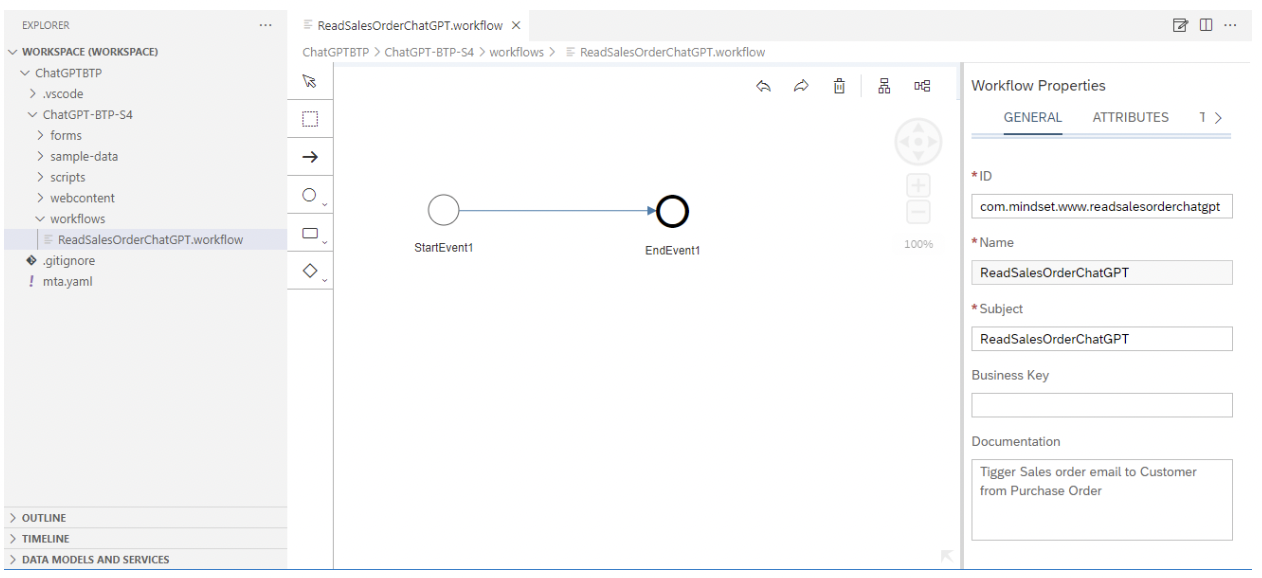
- Click on Start Event >> Click on details on the right pane >> create a .json file.

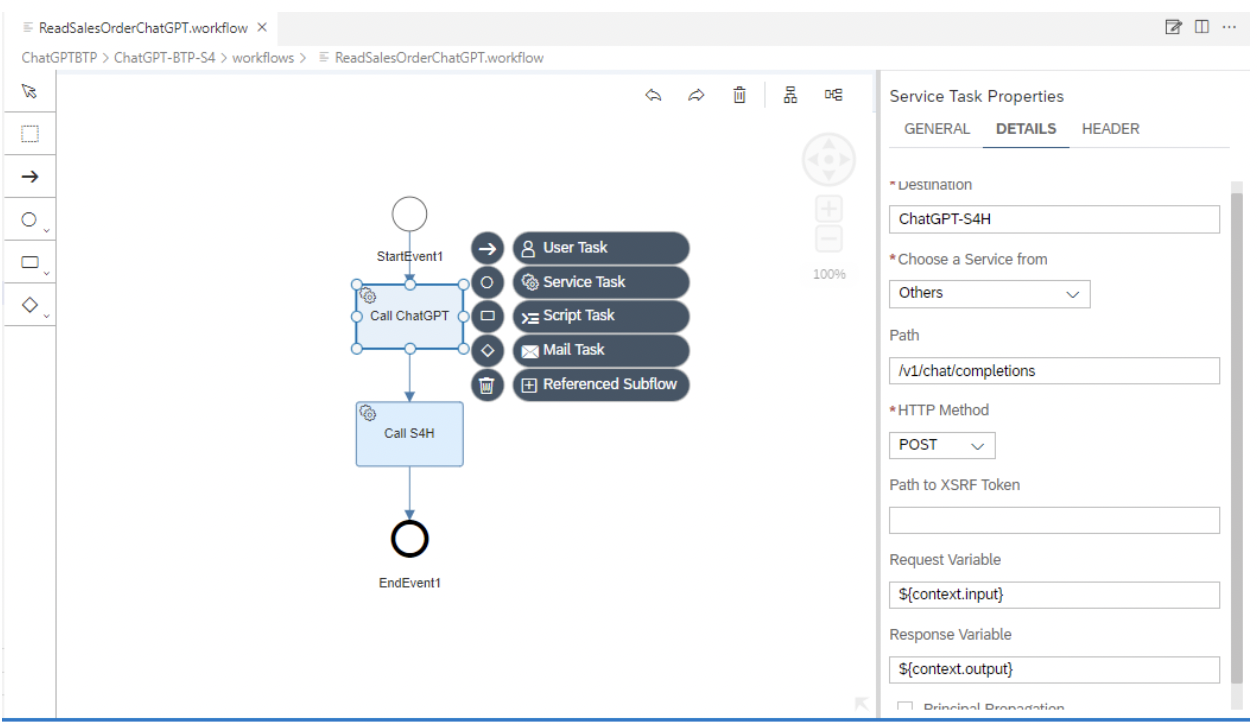
- Click on the 3rd Icon from the top in the start event and create a service task for ChatGPT. Add the destination name which we created earlier under the details section.
- Add the Request Variable and Response Variable as shown in the below screenshot.
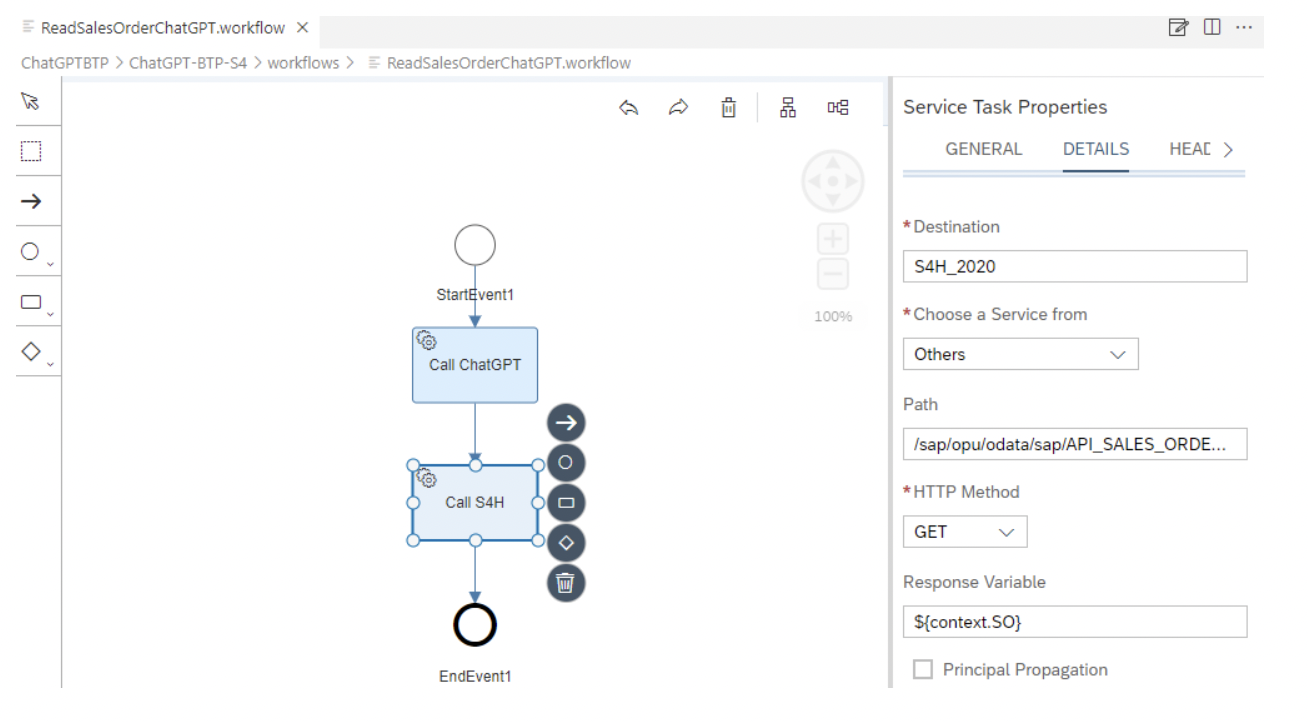
- Create a service task again to connect to the S4HANA system and add the destination name that we created earlier under the details section. Add the Response Variable as shown in the screenshot below.
- Right click on the mta.yaml file and build the project.
- Right click on the .mtar file under mta_archives file and deploy your project.
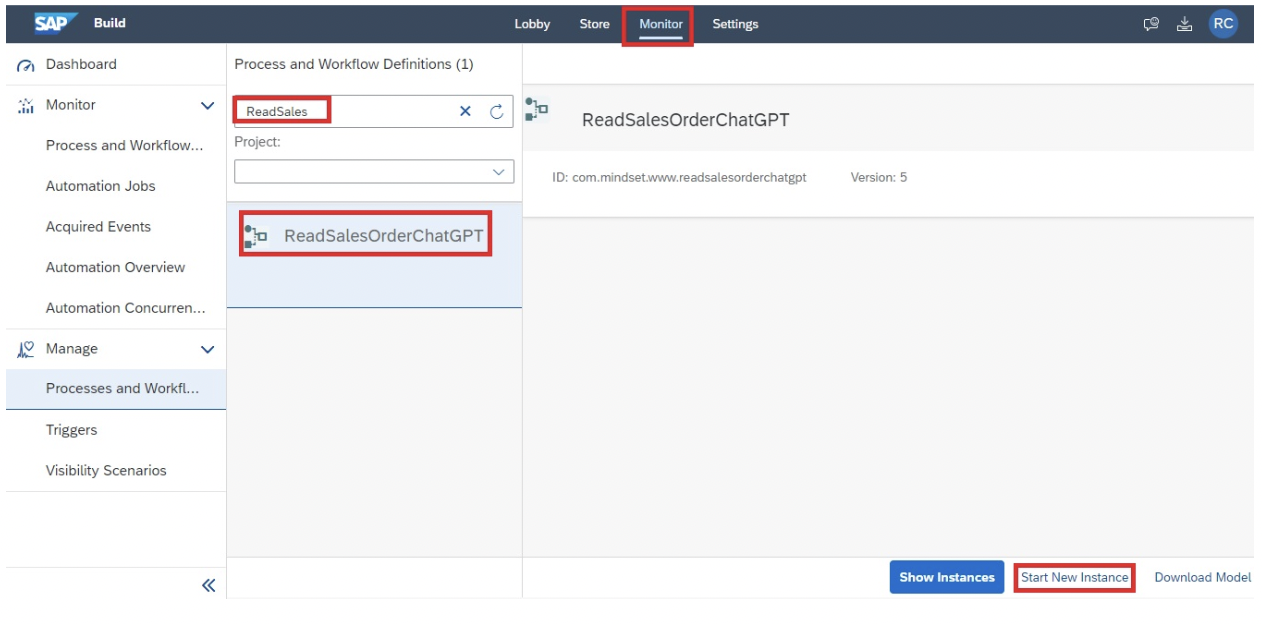
- Now login to your SAP Build Process Automation Service and go to the Monitor tab. Search for your workflow project.
- Go to Manage >> select Processes and Workflows.
- Click on Start New Instance. You will be able to see the below image.
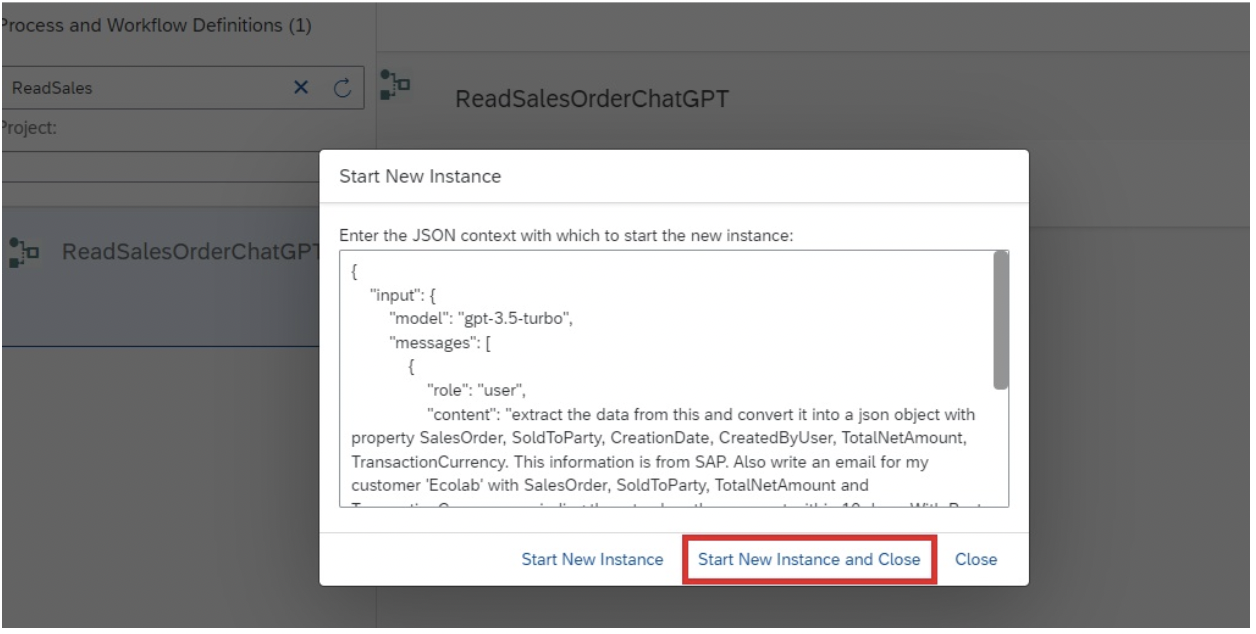
- A new popup will open containing the input that you have entered in the .json file.
- Click on the Start New Instance and Close button.
- Go to Monitor >> Select Process and Workflow Instances >> Select your Workflow instance from the list.
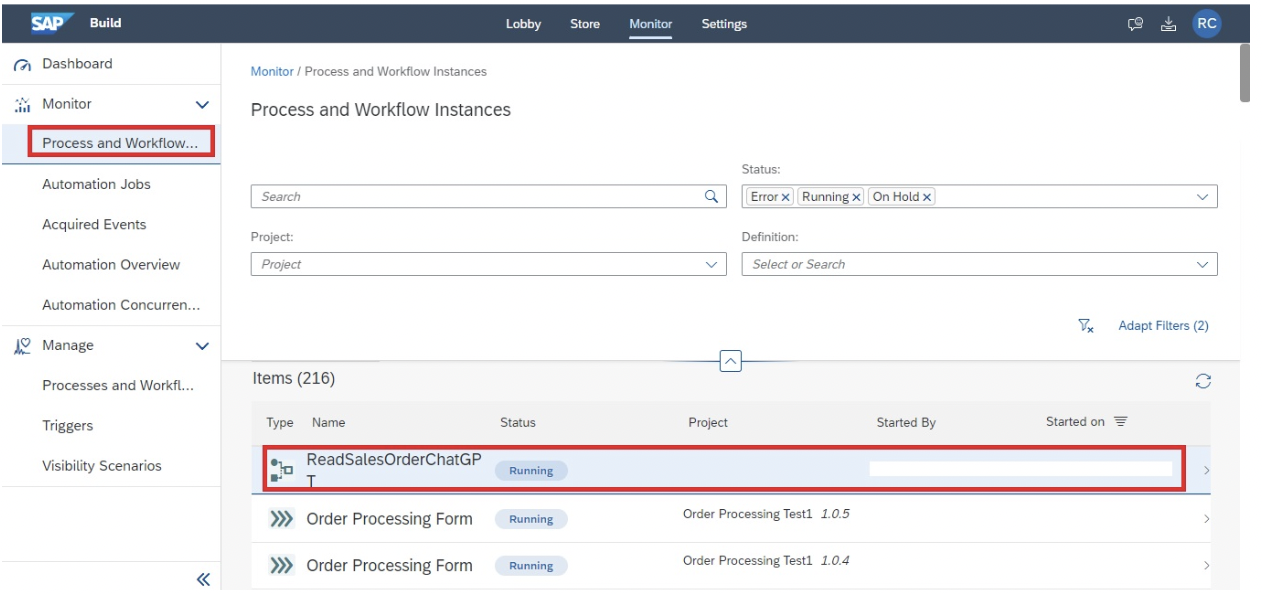
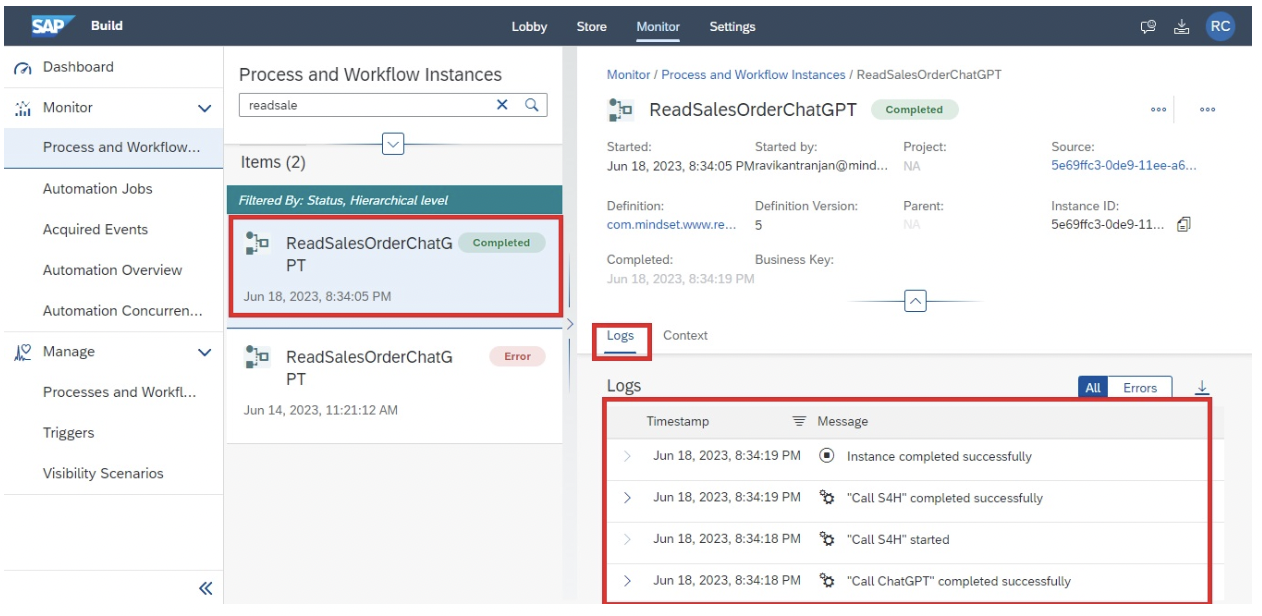
- In the details section, you will see ‘Logs and Context’. Under the logs section, you will see the workflow steps logs.
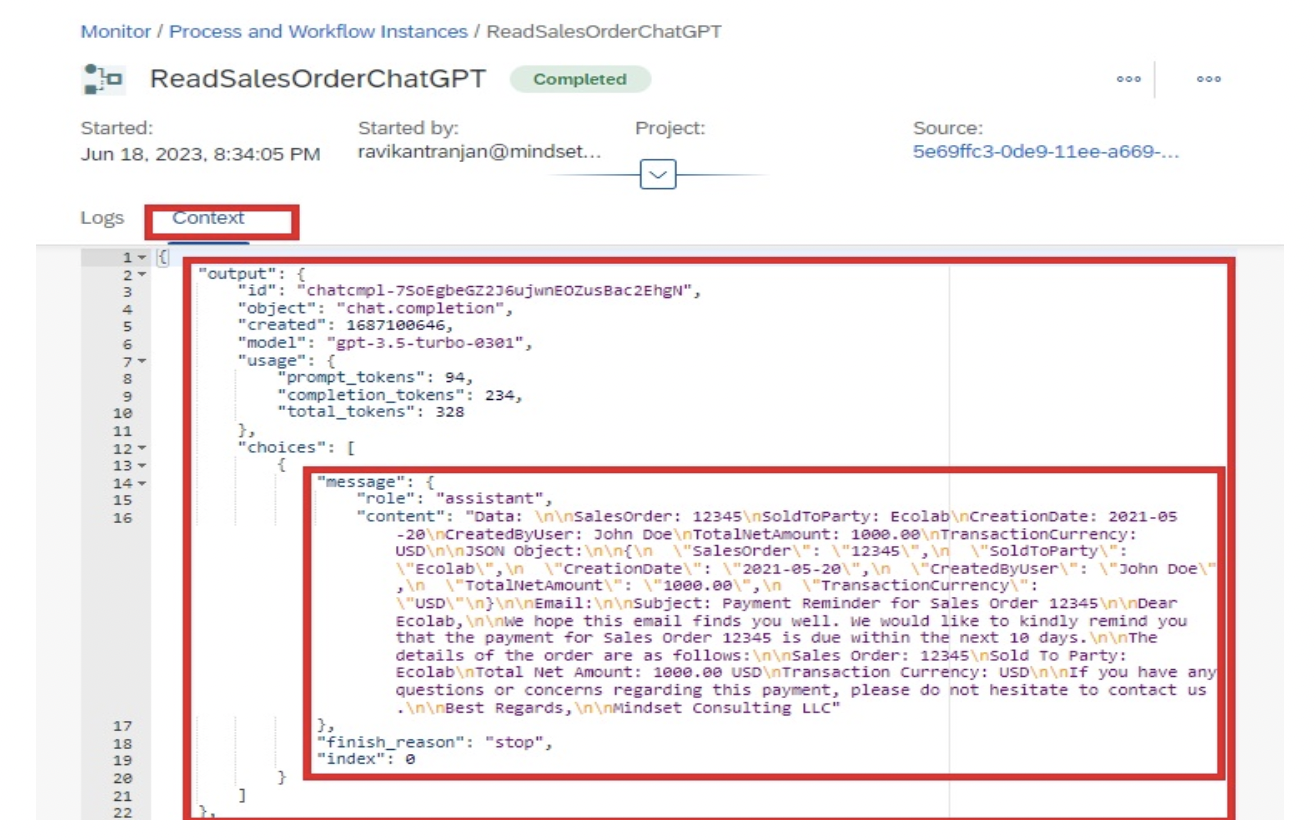
- In the context section, you will see the output of the Workflow i.e. ChatGPT’s reply which contains a beautifully constructed email with a Subject, Body and Signature.
With the above steps, you have completed the integration of ChatGPT with SAP S/4HANA with the help of BTP services like Workflow, Business Application Studio, and Build Process Automation. In my next blog, I will elaborate on how to dynamically send the input to ChatGPT and send the mail to the end user. Stay tuned for the next blog in this series.
Happy Learning!
If you have an interest in viewing similar content, visit our blog, here.
View our LinkedIn, here.