In this blog, we are going to learn about deploying a standalone SAPUI5 application on the Business Technology Platform (BTP), specifically, on the Cloud Foundry (CF) runtime environment. We are going to use the Business Application Studio (BAS) to do this. After that, we are going to learn how to enable User Authentication and Authorisation (XSUAA) for our newly deployed app.
So, first, let’s get started with creating our app in BAS. You need to have a trial account in BTP. Begin by creating the trial account (Create BTP Trial Account) if you don’t already have one
Now, I will take you through a step-by-step guide to deploying our first SAPUI5 standalone application to the BTP account using CF.
To keep things simple, we are going to use the easy-UI5 generator to produce our UI5 application which we will deploy later.
Install the easy-UI5 plugin to BAS
Open BAS and then open the terminal and run the below commands.
- Install Yeoman and the generator plugin

- Verify your installation

- Setup CF environment
- First, set up the CF API endpoint. This can be found in your BTP trial account. Copy the API endpoint from BTP and run the below command to set up CF API.
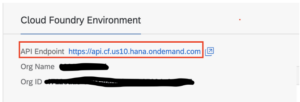

- This command will set up the CF API for deployment purposes. You will see more of this later in the blog.
- After the API has been set up, run the below command to log in to your BTP account using CF CLI.

This will ask for your BTP username and password. Once you have filled that in, press ‘Enter’ and you are done with the login. Now, with the environment setup done, we will move on to create our first standalone SAP UI5 application in BAS.
- Create your first UI5 application with the easy-UI5 plugin
- Go to your project directory and run the below command to generate a sample application.

- Create your app by following the step-by-step process
Once you run the above command the generator will ask you a set of questions for setting up the project. Answer the question one by one and then press enter to generate your project.
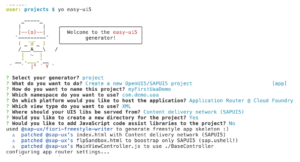
Your project is created once this step is completed and the folder structure will look like this.
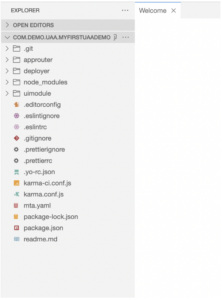
- Run your app for the first time
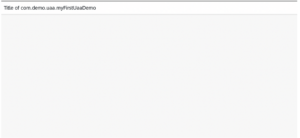
At this point, we can go ahead and run the new application created by the easy-UI5 generator. Open your project in the BAS terminal and then run the below command.

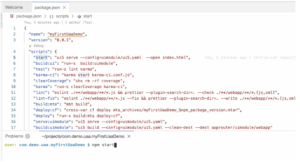
It will start the application. It should look like this.
Making Changes to Your App
Since your app has run successfully, you can go ahead and make some changes to it by adding a title and a description text. For this, go to your app folder and open MainView.view.xml file, and add the below code.
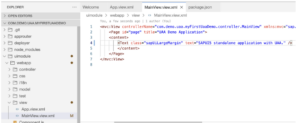
Now, let’s check our app which is already running. If your changes are not yet visible, hit the refresh button and that should resolve it.

Deploying Your App to the BTP Trial Account
In order to do this, you need to run the below command and it will deploy directly to the BTP account.
Remember, you have already set up the CF API with API URL from the BTP account. So, CF CLI is already aware of the BTP environment where you need to deploy the app.
Run the below command and it will build the app and deploy it in BTP CF runtime environment since this is a standalone deployment.

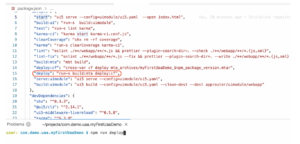
Here, you might wonder how only one command can take care of everything. Well, the answer is in our package.json file. We have a “deploy” script which is a combination of 2 separate commands. One is for the build and the other is to deploy. So, internally, it is building the app first, generating the mtar file, and then deploying it in BTP CF.
Once your deployment is successful, you will have the URL of our already deployed app. Copy and paste the URL into your browser and run your deployed app.


Checking for Correct Deployment of the App
Now that you have run the deployed app in your browser, let’s see where it is actually deployed in our trial BTP account.
To check this, go to the trial account and go to the Cloud Foundry environment. Under ‘Spaces’, you should be able to see the number of applications. Click on this to see the list of applications deployed in your BTP account.

There you go. This is where your application is deployed as a standalone app without any launchpad.

You can click on the application name and check the details. It will show you the latest logs of your deployment. This will be helpful when you want to debug any failed deployment.
Testing the App from a Different Browser
Up until now, you have deployed your app in BTP and checked the deployment app in BTP as well. But now, we come to the final part of this blog – UAA configuration.
If you have noticed, when you open your deployed app URL in a different browser or in an incognito mode where your current BTP login has not been carried out, it opens your application without any hitch. This is primarily because there is no authorization or authentication required for your app, so anyone can access it from anywhere.
However, this is not advisable in a real-time scenario. You must protect your app to prevent unauthorized access. In order to secure it;
- Create a UAA service in BTP
To secure your app with XSUAA (XSUAA is a BTP service for authorization and authentication), you need to create an XSUAA service in the BTP account.

- Open service instances from your trial account home page.
- Click on the ‘Create’ button at the top. This will open the below popup. Fill in the details.
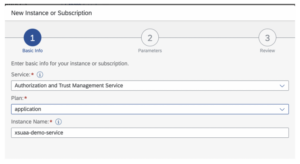
- Click ‘Next’. Add the below details and click ‘Create’.
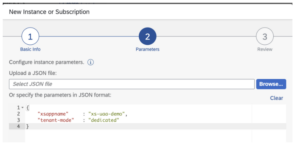
This will create a new XSUAA service in your BTP account. We are now going to use this service in our app for authentication.
- Use the newly created UAA service in your app
Now, replace the below code in your mta.yaml file. This file is responsible for the deployment in BTP CF. You will need to add the configuration in this file to use the XSUAA service.
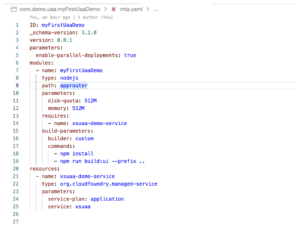
- Once this is done, change your xs-app.json file. This is an app router file responsible for handling your app’s route in the BTP CF environment.
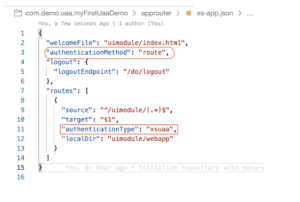
- Now, you are ready to deploy your app again. This time, enabled with XSUAA. Run the same command that we used earlier and deploy the app.
Checking the Deployed App in BTP
You have successfully deployed the app in BTP, enabled with XSUAA. To be sure, however, let’s check in BTP what these changes have led to.
Go to the XSUAA service that you have created and you can see your app is listed under the Bounded Application section. So, now you know your app is using the XSUAA service from BTP.
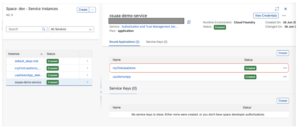
- Finally, test your app from a different browser
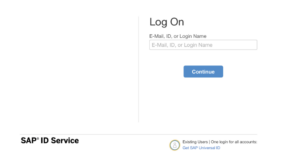
Now, if you run your deployed application in some other browser, it will ask you to log in. You can now protect your standalone application deployed in the BTP CF environment.
I hope this simple step-by-step guide helped you create your standalone app and add UAA configuration to it. You can now create your own application without batting an eyelid.
If you are interested in viewing similar articles, visit our blog, here.